Playlists are media collections that contain links to resources (video, audio, images) in CaliforniaStreaming. These lists can be used to provide quick access to resources that you have found useful. Users can create their own playlists or access playlists that have been shared by others.
Besides an overview of playlists (below), this page will also provide information on
- Creating Playlists
- Viewing Playlists
- Editing Playlists
- Deleting Playlists
- Shared and Public Playlists
- Editing Playlist Categories
To access playlists, click the “Playlists” link in the menu at the top of the page. You will be taken to the Browse Playlist page.
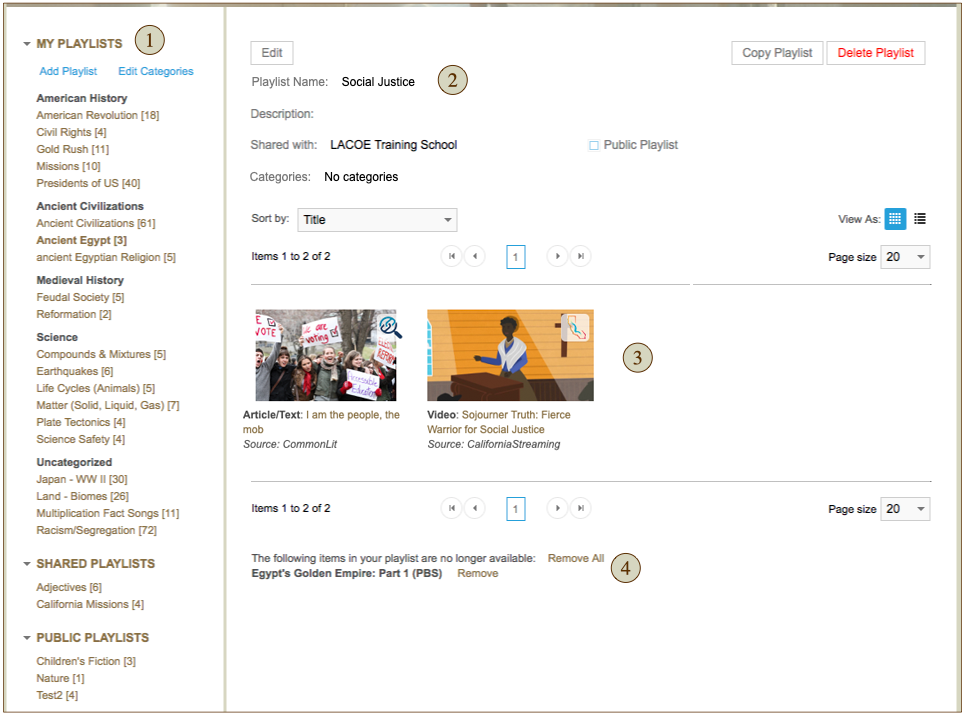
- The left navigation bar contains a list of playlists. These are organized in three (3) groups:
- My Playlists – User’s own collection of playlists; can be organized in categories and shared with others. By default, “My Playlists” are open and visible.
- Shared Playlists – List of other users’ playlists that have been shared within your school, district or county.
- Public Playlists – List of other users’ playlists that have been marked as “public” and are shared with all users in the system.
- Playlist information/description will display in the upper portion after a playlist has been selected in the left navigation bar.
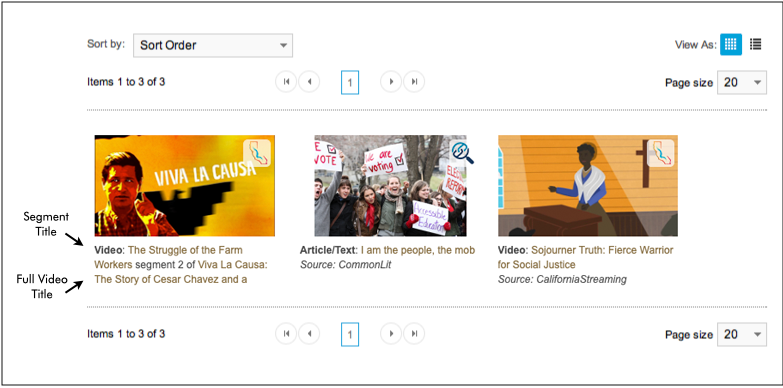
- The media contained in the playlists display in grid view by default.
- Inactive items (if any) display below the thumbnails of media in your playlist.
CREATING PLAYLISTS
Creating a Playlist From the Playlist Page:
- From the menu at the top of the page, click “Playlists.”
- In the left navigation bar, below My Playlists, click the “Add Playlist” link.
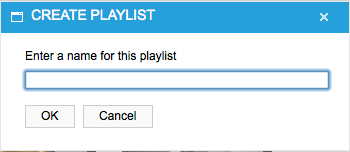
- Enter the name of your playlist in the Create Playlist pop-up window and click “OK”.
4. To edit your new playlist, click the “Edit” button to add any of the following information:
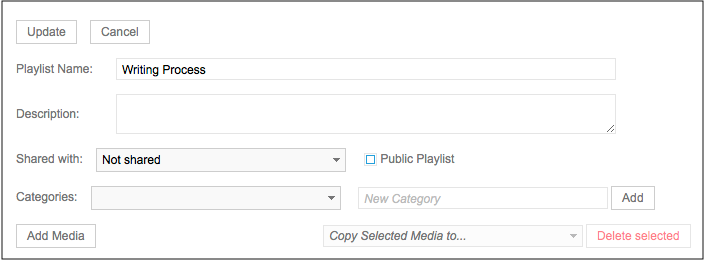
- Description – Enter information about the contents of your playlist.
- Shared with: – Select from the pull-down menu with whom you’d like to share your playlist. By default, it is “Not shared.” Any shared playlists will appear in the “Shared Playlist” section.
- Public – Check the box if you want to share your playlist with all users in CaliforniaStreaming. These playlists will appear in the listing of “Public Playlists”.
- Categories – Select a category. If you want to create a category, type the name of the category in the “New Category” field, and click the “Add” button. (Note: You can select multiple categories for a playlist. If you don’t select a category, it will appear in the “Uncategorized” section at the bottom of “My Playlists”.)
- To save your changes, click the “Update” button at the top of the playlist display.
- To make additional changes to your playlist, or add more items, click the “Edit” button.
Creating a Playlist From the Asset Detail Page:
If you have found a video, image or audio file that you like and decide to add it to a playlist, you can do so directly from the detail page.
- From the asset detail page, make sure that “New Playlist” is selected in the Add to Playlist pull-down menu. Then click the “Add” button to the right of the pull-down menu.

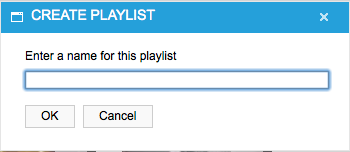
2. Enter the name of your playlist in the “Create Playlist” pop-up window and click “OK”.
- To edit your new playlist, click the “Edit” button.
- To save your changes, click the “Update” button at the top of the playlist display.
- To make additional changes to your playlist, or add more items, click the “Edit” button.
VIEWING PLAYLISTS
- From the menu at the top of the page, click “Playlists.”
- A list of playlists will appear in the left navigation bar of CaliforniaStreaming. By default, “My Playlists” is open.
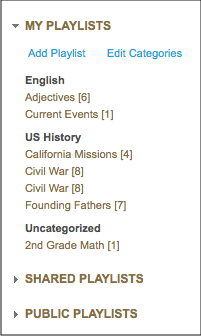
3. Click the triangle to the left of “Shared Playlists” or Public Playlists” to expand or collapse these lists. Note: If you have shared any or your playlists or made them public, you will not see them in the Shared or Public Playlists. Since you already have access to them in “My Playlists” they will not display in your view of Shared or Public lists. They will only be visible to others.
4. Click on the title of the playlist that you want to view.
5. Items in the playlist will display on the right side of the page.
6. Select to view your playlist in grid or list view. Grid view is selected by default.
![]()
7. Mouse over the thumbnail or title of the item in your playlist to see a full description.
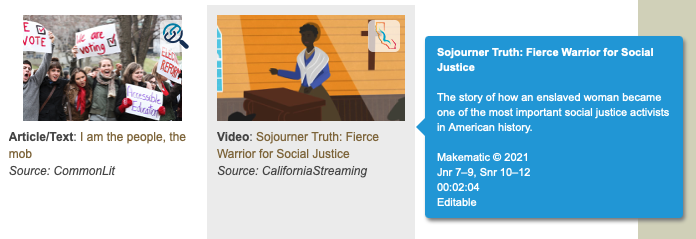
Note: to view the pop-up descriptions on an iPad, tap on any white space next to/below the title.
8. Click on the thumbnail or title of any item in your playlist to take you to the asset detail page.
Note: If the item in your playlist is a segment, both the full video title and the segment title are displayed as a clickable links. Clicking on the segment title will go directly to the selected segment; clicking on the full video title will take you to the full video detail page and begin streaming the full video.
9. You can stream or download the item from the asset detail page by clicking the play button or the download link. See page on streaming or downloading for additional help.
10. To return to your playlist, click the “Back to Playlist” link that appears above the media title.
EDITING PLAYLISTS
Once you’ve created your playlist, you can edit any of the information, change sharing permissions, or add/copy/remove media items in the list. To edit your playlist:
- From the menu at the top of the page, click “Playlists.”
- In the left navigation bar, click the name of the playlist that you want to edit.
- Click the “Edit” button at the top of the playlist.
- Make any desired changes. See the following sections for specific information on:
- Editing Playlist Information
- Adding More Media to Your Playlist
- Removing Items from Your Playlist
- Copying Items to Another Playlist
- Click the “Update” button to save your changes.
Editing Playlist Information
- Change any information about your playlist.
- Playlist Name / Description – Make corrections or changes as needed.
- Shared with – Select from the pop-up menu. To unshare, select “Not shared.”
- Public – Click the box to select/deselect.
- Categories – From the pull-down menu, check or uncheck a category. To create a new category, type the name in the “New Category” field, and click the “Add” button.
- Click the “Update” button to save your changes. Note if you add/remove media from your playlist before clicking to update, any changes will be lost.
Adding More Media to Your Playlist
- Click the “Add Media” button.
- Conduct a search for content. (For more details on searching, see pp 1-4.)
- Select an item in your search results to view. You will be taken to the Asset Detail Page to preview the item.
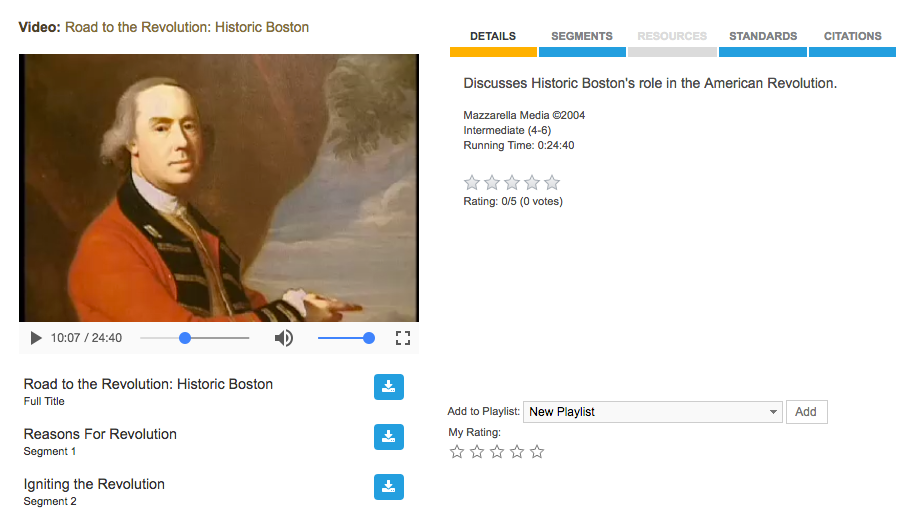
- If there are video segments, you can select the “Segments” tab to preview these.
- Check that the correct playlist is selected in the “Add to Playlist:” pull-down menu. Please note:
- The playlist that you were viewing on the playlist page should already be selected in the pull-down menu. You can change to another playlist, if desired.
- The item that is displayed in the preview window is what will be added to your playlist. If you want to add a specific segment, make sure that this is what has been selected and is displayed.
- Click the “Add” button. You will be returned to your playlist.
Removing Items From Your Playlist
- Click on the thumbnail(s) in your playlist. The item will be highlighted in blue when it is selected (Figure 36). Note: If you cannot select an item, make sure that you are in the playlist edit mode. You should see the “Update” and “Cancel” buttons above the playlist name.
- Select additional items to delete, as needed.
- Click the “Delete selected” button located above the thumbnail/grid view options (in red text).
- In the confirmation pop-up, click “OK” to confirm removal from your playlist or “Cancel” to continue without making changes.
Copying Items to Another Playlist
Copying allows you to easily add already selected media into another playlist.
- Click on the thumbnail(s) in your playlist. The item will be highlighted in blue when it is selected.
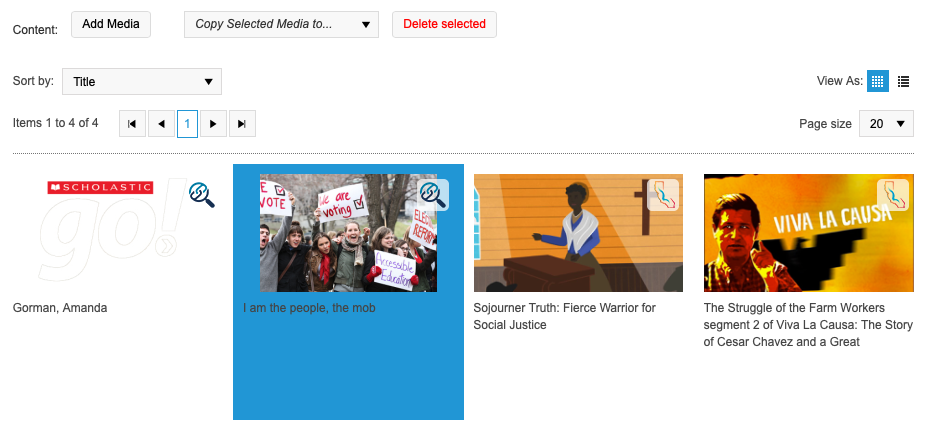
- Select additional items, as needed.
- Choose the name of the playlist in the “Copy Selected Media to…” pull-down menu. You can also choose “New Playlist” to create one. (See page 10 for information on Creating Playlists.)
- The highlighted media will automatically be copied into the selected playlist and you will be taken to the selected playlist.
DELETING PLAYLISTS
- From the menu at the top of the page, click “Playlists.”
- In the left navigation bar, click on the title of the playlist that you want to delete. The playlist will display on the right side of the screen.
- Click the <Delete Playlist> button in the top right corner of the playlist display.

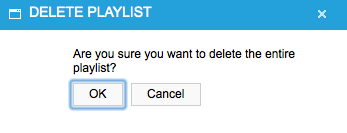
4. The “Delete Playlist” popup will appear for you to confirm your selection. Click “OK” to delete the entire playlist from your account or “Cancel” to continue without deleting.
Shared/public playlists can be viewed by other users, but they cannot be edited. If you find a shared or public playlist that you like, you can copy the entire playlist or selected items to your own playlist.
Viewing a Shared or Public Playlist
- From the menu at the top of the page, click “Playlists.”
- In the left navigation bar, click the triangle to the left of Shared Playlists or Public Playlists to expand the list.
- Click the name of the playlist to display its contents. The display looks similar to your own playlist display with a couple differences:
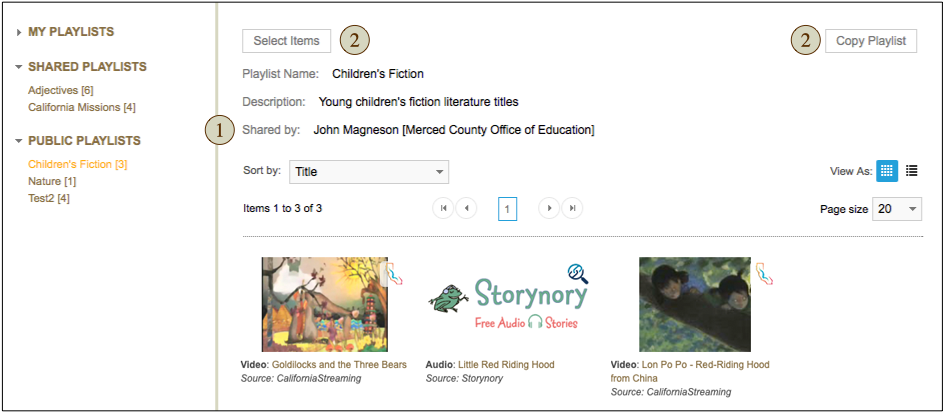
- “Shared by:” indicates the owner of the playlist. The playlist owner’s site (school/district) is provided in parentheses after their name.
- The option to edit the playlist is not available. Instead, you have buttons that allow you to “Select Items” or “Copy Playlist” located at the top of the display.
- Click on the media thumbnail or title to go to the item’s detail page.
- You can stream or download the item from the asset detail page by clicking the play button or the download link. (For more details, see streaming or downloading pages)
- To return to the playlist, click the “Back to Playlist” link that appears above the media title.
Copying Media Items From a Shared/Public Playlist to Your Own Playlist
- Click the “Select Items” button at the top of the shared or public playlist.
- Choose the items in the playlist that you want by clicking on the thumbnail(s). The item will be highlighted in blue.
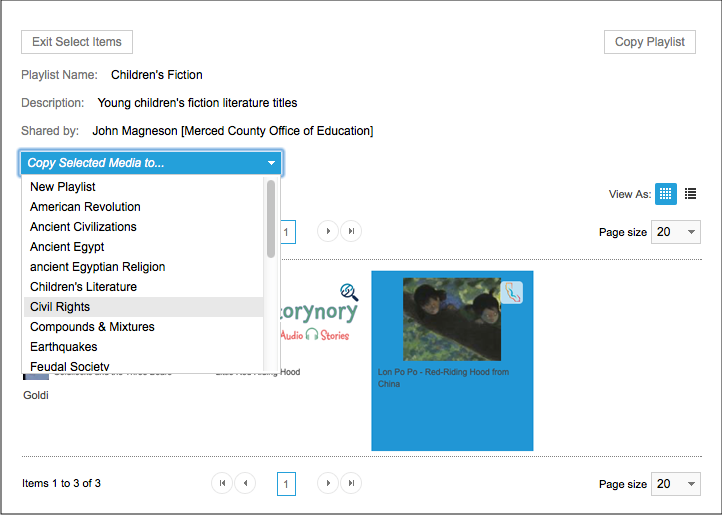
3. In the “Copy Selected Media to…” pull-down menu,
- choose one of your playlists from the list, or
- choose “New Playlist” and enter a name for your new playlist when prompted.
4. The selected items will be copied, and you will be taken to the selected (or new) playlist.
Copying a Shared/Public Playlist
- At the top of the shared/public playlist, click the “Copy Playlist” button.
- In the pop-up box, enter a name for your playlist.
- Click the “OK” button.
- A new playlist will be created with all of the items from the shared/public playlist. This new playlist will appear in “My Playlists” where you can edit it as needed.
PLAYLIST CATEGORIES
Categories can be setup to keep your playlists organized. Only those categories that contain playlists will display in “My Playlists.” You can add, edit, or delete these categories from the Playlist page.
- From the menu at the top of the page, click “Playlists.”
- In the left navigation bar, below My Playlists, click the “Edit Categories” link.

To Add a New Category
- Click “Add New Category”.

2. Type the name for the category.
3. Click the “Insert” link. The new category will be added and display in alphabetical order.
To Edit a Category
- Click the “Edit” link to the left of the category you want to change.
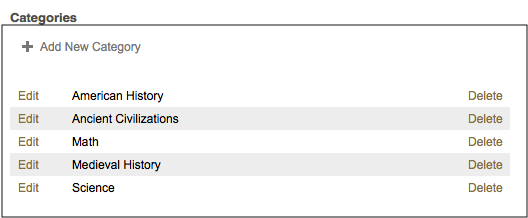
2. Edit the name of the category as needed.

- Click “Update” to save your changes.
To Delete a Category
- Click the “Delete” link to the right of the category to be removed.
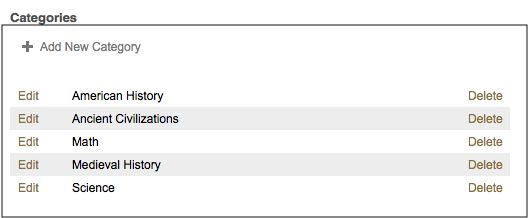
2. In the pop-up confirmation box, click “OK” to delete.
